Introduction
The Internet of Things (IoT) is rapidly transforming our world, connecting everyday devices to the internet. For those venturing into this exciting field, a powerful yet affordable development board is essential. Enter the ESP8266 Node-MCU CP2102, a popular choice among hobbyists and professionals alike.
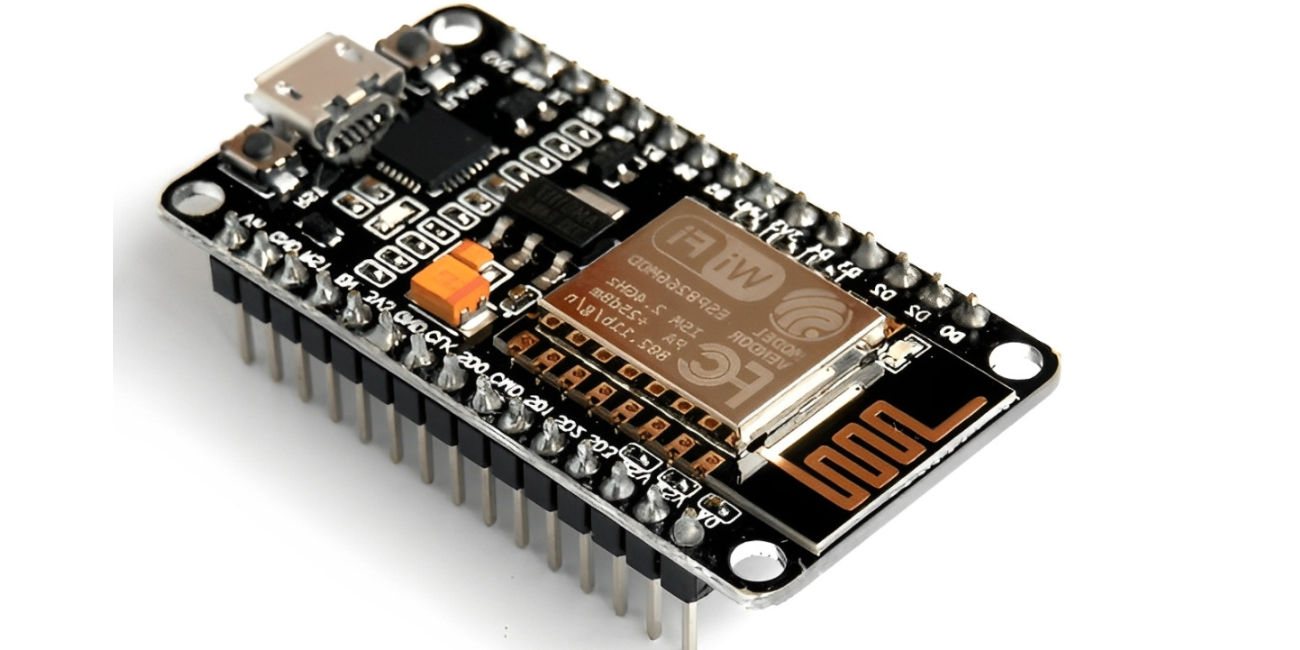
What is the ESP8266 Node-MCU CP2102?
The ESP8266 Node-MCU CP2102 is a low-cost development board based on the ESP8266 Wi-Fi chip. This chip, manufactured by Espressif Systems, integrates a powerful microcontroller with built-in Wi-Fi capabilities. The NodeMCU board provides a user-friendly platform for developing IoT projects, with features like:
- Wi-Fi Connectivity: Enables wireless communication with other devices and networks.
- Microcontroller: Offers processing power for running your code and controlling peripherals.
- GPIO Pins: Allow you to connect various sensors, actuators, and other external components.
- USB-to-Serial Converter (CP2102): Facilitates easy communication with your computer using a USB cable.
- Open-Source Firmware: Runs on the popular Arduino IDE, making it accessible to a wide range of users.
Key Features and Benefits
- Affordability: The ESP8266 NodeMCU CP2102 is remarkably inexpensive, making it an excellent choice for budget-conscious projects.
- Low Power Consumption: The ESP8266 chip is designed for low-power operation, ideal for battery-powered devices.
- Small Form Factor: Its compact size makes it suitable for a wide range of applications and easy to integrate into projects.
- Large Community and Resources: A vast online community provides extensive support, tutorials, and libraries for the ESP8266.
- Versatility: The board can be used for a wide range of IoT projects, including home automation, environmental monitoring, remote control, and more.
Getting Started with the ESP8266 Node-MCU CP2102
- Install the Arduino IDE: Download and install the Arduino IDE from the official website.
- Install the ESP8266 Board Support Package: Open the Arduino IDE and go to "File" > "Preferences."
- Select the Board: Open the "Tools" menu in the Arduino IDE, select "Board" > "Boards Manager," and search for "ESP8266." Install the latest version.
- Connect the Board: Connect the Node-MCU board to your computer using a USB cable.
- Select the Port: In the "Tools" menu, select the correct serial port for your board.
- Upload Code: Write your code in the Arduino IDE and upload it to the Node-MCU using the "Upload" button.
Tips and Troubleshooting
- Power Supply: Ensure that your Node-MCU board is receiving adequate power.
- Connections: Double-check all connections to avoid unexpected behavior.
- Firmware Updates: Keep your Node-MCU firmware up-to-date for the latest features and bug fixes.
- Community Resources: Utilize online forums and communities for help and support.
Conclusion
The ESP8266 Node-MCU CP2102 is a powerful and versatile development board that provides an excellent entry point into the world of IoT. Its affordability, ease of use, and extensive community support make it a popular choice for both hobbyists and professionals. With a little experimentation and exploration, you can unlock the full potential of this remarkable board and create innovative IoT projects.
Disclaimer: This blog post is for informational purposes only and does not constitute professional advice.