
DSM Online Support
Support Master
Welcome to DSM Online
How can I help you today
How can we assist you? please let us know the support you need from DSM Online
In the vast landscape of DIY electronics, where blinking LEDs and complex code routines reign supreme, sometimes the simplest components are the most powerful. When you need to translate a human's intent—to turn up the volume, slow down a motor, or dim a light—into a language a microcontroller can understand, you reach for the potentiometer. Specifically, the 10k rotatory potentiometer is the workhorse of choice, and having a potentiometer pack 2 ensures you’re always ready for your next dual-control project.
Often overlooked in favor of flashy digital displays or complex sensors, the humble pot remains the most intuitive and fundamental device for continuous, analog control. If you’re building an interface that truly needs to feel tactile and responsive, mastering this variable resistor 10k is essential.
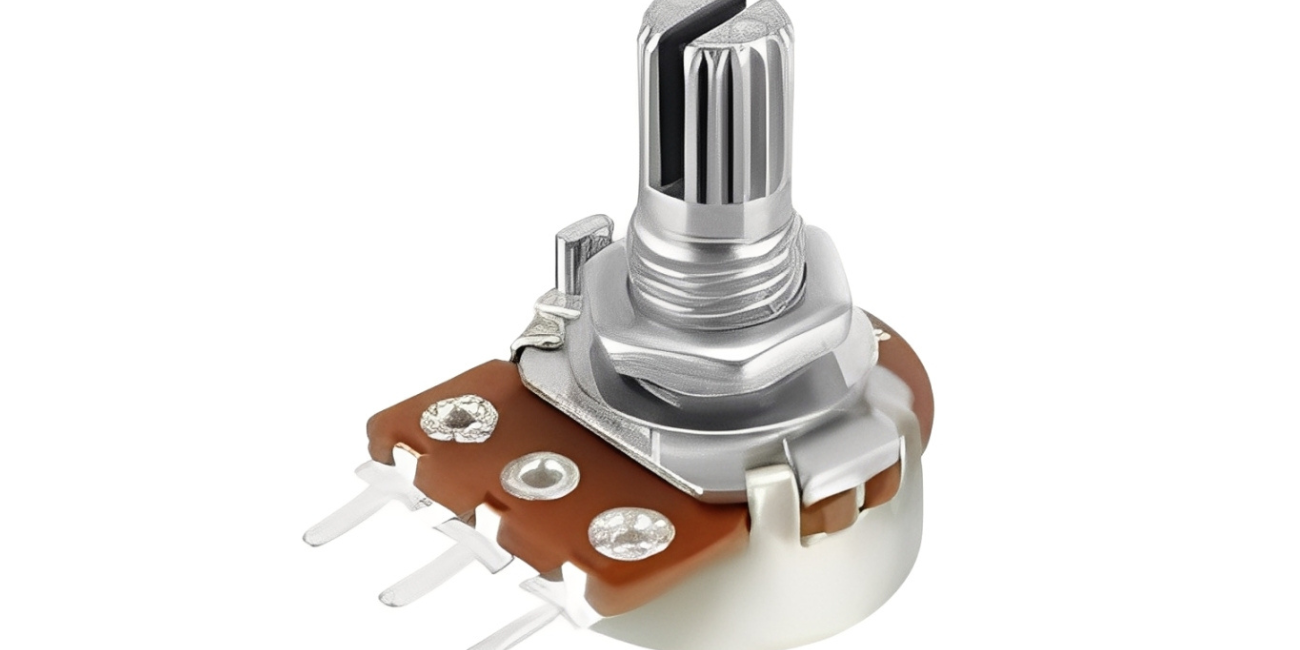
A potentiometer is, fundamentally, an adjustable resistor. It consists of a resistive track and a wiper (the contact arm) connected to a rotatory shaft. As you turn the knob, the wiper moves along the track, changing the resistance between the wiper terminal and the two outer terminals.
The 10k Value: The "10k" (10,000 Ohms) denotes the maximum resistance across the two outer pins. This is a sweet spot for most low-power electronics, particularly when interfacing with a 5V microcontroller like an Arduino. It provides enough resistance to limit current flow, but is low enough to give a clear voltage signal.
The Voltage Divider Principle: The pot’s genius lies in its use as a DIY voltage divider. You connect the two outer pins to your power source (e.g., 5V and GND). The middle pin (the wiper) then outputs a voltage that varies smoothly from 0V to 5V as you turn the knob. By connecting this middle pin to an analog input on your microcontroller, you can read a value (e.g., 0 to 1023 on Arduino) that precisely corresponds to the knob's physical position.
In essence, the pot acts as a simple yet effective analog input sensor, converting physical rotation into a smoothly varying electrical signal.
While microcontrollers operate in the digital world, humans operate in the analog world. We instinctively understand that turning a knob clockwise increases a value and counter-clockwise decreases it.
Intuitive Interface: For applications like Arduino volume control or setting motor speed, the rotatory potentiometer is simply unmatched. It provides a natural, human-centered interface that is miles ahead of using up/down buttons.
Absolute Positioning: Unlike a rotary encoder, which only tells you how much it has been turned since the last read (relative position), the potentiometer gives you an absolute position reading. If the power turns off and then back on, the pot immediately knows where it is set, making it perfect for applications like preset adjustments.
Value in Pairs: The benefit of the potentiometer pack 2 is immediate for projects that require two independent axes of control. Think of stereo audio controls (left and right channels), X/Y positioning in a camera slider, or setting two different parameters (speed and brightness) simultaneously.
The 10k rotatory potentiometer is one of the most versatile components in your kit. Its applications are limited only by your imagination:
Motor Speed Control: Use the pot to adjust the duty cycle of a PWM signal, giving you smooth, fine-tuned control over the speed of a DC motor.
LED Brightness/Dimmer: A classic use: controlling the intensity of an LED or a lighting strip by varying the voltage input to a PWM pin.
Time and Calibration: Easily adjust the duration of a timed event, the sensitivity of a sensor (like a light sensor), or the parameters of a visual display. It’s an easy way to tune a project without recompiling code.
Function Generator: Creating variable frequency or waveform shapes in basic signal generation projects.
Game Controllers: Building custom analog input controls for small robotics or DIY video games.
Wiring a 10k pot wiring is incredibly simple:
Connect one outer pin to VCC (the positive voltage rail, usually 5V).
Connect the other outer pin to GND (ground).
Connect the middle, or wiper, pin to an Analog Input pin on your microcontroller.
Pro-Tip: Always connect the outer pins to your power rails and never try to pass significant current through the potentiometer. It is designed to handle very low current for signalling purposes only. Using it to directly power a motor or a bright LED will burn out the resistive track instantly. By using it as a voltage divider to feed a signal to your microcontroller, you ensure both the pot and your project stay safe.
The 10k rotatory potentiometer is the essential component that brings the human touch back to digital electronics. It’s the simple, reliable, and versatile analog input sensor that every maker needs to master. Whether you’re dialing in the perfect pitch or setting the precise speed of a robot, having a potentiometer pack 2 ready ensures you have the intuitive control needed to turn any digital project into a truly interactive experience.

